Pages

Monday, November 30, 2009

One Character Note


One of the major benefits of the Sure Cuts A Lot (SCAL) software from Craftedge is the ability to cut out any character from a true type font on your computer. Most fonts are True Type. And there are many available to download for free. I downloaded the Floralia font from dafont.com because of the beautiful intricate images of each charcter.
.
This card front is cut using only one charcter of that font enlarged to 3 3/4" x 5". I used a thick designer paper from My Mind's Eye that was in my scrap bin. I had enough to cut out the design and use the other side of the paper for the backing to peak through. A couple of embellishments and a little ink distressing on the edges and it was all done. Plus I have the cut out designs left I can use on a layout or card.
.
These character fonts are called ding bats but whoever creates them is pretty smart and generous.


Ingredients: Paper: 29th Market Street collection from My Mind's Eye
Ink: Baja Breeze from Stampn' Up!
Font: Floralia from dafont.com

Sunday, November 29, 2009

Bargain Shopping

Next November I'm going to have to remember to save more of my scrapbooking budget for the Thanksgiving weekend. Electronics, clothes and toys aren't the only things on sale this holiday weekend. There are deals for us paper addicts, too. And best of all, you don't have to get up at 3:00 in the morning to snag them.

Check out AddictedtoScrapbooking.com. They are having a sale through Monday, Nov 30. I picked up a great deal on a paper pack and some embellishments. I'm most excited about an adorable Valentine set I have coming from Hampton Art. It is just so cute; can't wait to use it.

Friday, November 27, 2009

Inspired by What???

This card was actually inspired by a dog sweater. Yep, a doggie. I was taking a walk in the park the other day and passed a woman walking her small dog dressed in a cute little multi-colored sweater. I only got a glance but I saw some red and lighter shades of blue in the narrow stripes of the sweater. I thought those colors would make a great background for a card. (I really wanted to see the sweater closer but resisted the urge to turn around a follow a dog.)

I raided my scrap cardstock bin which is getting so full the lid won't close. Also, getting a workout were several pairs of decorative scissors I hardly ever use. The chipboard snowflake is from Stampin' Up! and is sponged in white craft ink.

Look around. Apparently, you can find inspiration anywhere.


Ingredients: Stamps: Define Your Life by Stampin' Up!
Ink: Versamark, Whisper White
Embossing powder in white and chipboard also by SU!

Thursday, November 26, 2009

The Supervisor


I took quite a few photos on our non-traditional holiday. After our meal (beef, not turkey), we took a hike in a local park. It was a pretty day for November in NC - about 60 degrees was the forecast. We followed hilly trails so felt very justified in dining on pumpkin pie for Lenny and ice cream for me when we returned.

The photo above is probably my favorite. The subject is traditional for Thanksgiving - making sure you get a big enough slice of the pie. My parents came over late in the afternoon full from their own meal out (they really do love to eat out). So they wanted to take their pie with them. Lenny is cutting their pieces with lots of supervision from his mother-in-law. He's used to it. Glad the camera was handy.
This morning I finished my "Home for Christmas" cards with a couple more arrangements. In this one, I needed something to balance the design so I used a pine needle design stamp from Inkadinkado stamping in Old Olive on Old Olive cardstock. Just enough.


The tags were cut with the Cricut and I can't get enough of that baking twine from Martha Stewart. It comes in a package of 2 spools each of brown/white, green/white and red/white.
Other ingredients: Stampin' Up! DSP in Real Red, Cardstock in Kraft and Chocolate Chip
Old Olive ribbon from SU!'s Holiday Mini catalog.

Wednesday, November 25, 2009

A Thanksgiving Carol

Dicken's gave us a Scrooge for Christmas. I now give you a Scrooge for Thanksgiving - me. Now who wouldn't love a holiday filled with food, family, parades, and football all gearing up for the Black Friday sales? Me. I've prepared more than my share of traditional Thanksgiving meals which I don't really like. I have no interest in sports. While I love my family, there are better ways of showing it than spending 6 hours in the kitchen for 20 minutes of dining time. Oh and then there are the dirty dishes. And I won't be going near a shopping center on Friday - been there, done that, too.

Now I do like the sentiment. I just think it needs to be practiced far more often than once a year. My journal entries all start with "What I'm grateful for" and I list 5 things. They might be huge crucial things like my husband's love and my parents good health or trivial things like a favorite TV show. Sometimes I really want to skip this. I'm wound up and I want to let it all out in my journal, but I make myself list the first 5 things I'm thankful for that come to mind. Usually I unwind a little and gain some perspective.

So while it is important to be thankful and having a holiday is always nice, I'm going the mostly non-traditional route this year. I did bake a pumpkin pie this morning for my husband. I made sweet potato pie last year and he felt cheated so I owed him. I do have to admit that pumpkin is one of the easiest homemade pies to make. I follow Martha's and my dear late friend, Jane's, pastry recipe. I thought of Jane this morning while I rolled out the dough using my sister-in-law's method of placing the pastry between two pieces of plastic wrap. I did get a great crust. I'm grateful to all these talented ladies for sharing their expertise.


The rest of the weekend is gearing up for Christmas. You won't find me being Scrooge at Christmas time. I love it! Tomorrow afternoon while my husband naps off the non-traditional lunch I'm making (I let him choose the menu), I'll be raiding the attic for garland and boxes of ornaments. Later in the evening, my parents will be by to sample pumpkin pie. (Shh! Don't tell Lenny I've already invited them to share. He thinks he is getting this pie to himself :-)


I'm still working on cards as seen in the photo above. All the coloring is done, it is down to assembly. I feel like one of Santa's elves. Better than a turkey any day!

Tuesday, November 24, 2009

TIPsy Tuesday - Thanks to Ten Tools

Here are the 10 papercrafting tools I'm most thankful for:


10. Wide format photo printer - I intended to use this monster for more digital layouts. In actuality, I've used it for more hybrids, printing my journaling and sometimes titles on 12x12 paper. I'm printing a lot more photos than I expected. It is hard to beat the convenience of printing out a little smaller or larger version of a photo in your own home rather than running to a local photo lab. In fact, after this post that is the next thing I'm going to do is print some smaller photos for layouts I want to work on this weekend.

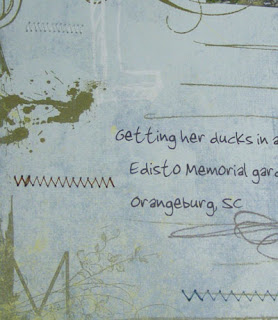
9. Sewing machine. While I don't sew on layouts or cards all that often, I do love to add that little touch of texture now and again. Plus, it actually looks better to sew crooked on paper. I never get to do that on fabric.

8. Blender Pens by Stampin' Up! These are consumable as they eventually run out of water or whatever the clear liquid is inside. In the meantime, they make coloring images sOO much easier.

7. Stampin' Scrub - how did anyone clean stamps before this was invented?

6. My Epson All-in-one printer. I actually argued with the sales guy at Best Buy a few years ago that I didn't need or want a printer/scanner/copier. We had a scanner and I hardly ever copied anything. I'm so glad he and his $75 after-rebate-printer won out. Also, I hadn't used Epson printers since the days of dot matrix printers but their quality holds true. We use this printer for everything from making backup copies of tax forms, to scanning old photos of window treatments to show my customers, to printing the inside greeting on a card.

5. 4 bulb flourescent desk lamp by Verilux. It is the truest to natural light I've found in a lamp.

4. Cricut Expression by Provocraft. I'm amazed that this ranks so high on the list after only a few weeks yet I'm using it on all my scrapbooking layouts and many cards. It is making me look so smart and efficient. And I haven't even gotten around to doing some of the things I got it for in the first place!

3. Creative Memories circle and oval cutters. Replacement blades are on my holiday wish list. I've only replaced one blade in the 8 years I've had my set. I've never found a better portable cutting system. With these you need far fewer circle and oval punches, tool.

2. A dressmakers awl. A carpenter's awl is used to start holes before you put in a nail or screw. A dressmaker's awl found in the notions department of a fabric store also punches little or larger holes in paper depending on how far you push it through the paper. I make holes for brads, do paper piercing, fray the edges of ribbon or fabric, pull glue dots off the roll - its endless how many uses this tool has.

1. A gridded ruler. I have another one in my workroom for fabric also. I just can't imagine working without it.

I just realized that I left off my camera and my laptop. They are so attached to me - at least the laptop is - that I don't even think about them. So thanks to all the inventors of these tools for making my life easier.

And thanks to you for reading! Hope you have a very happy and safe holiday.

Monday, November 23, 2009

Designer Paper Flower

Do you ever get a design stuck in your head and you just can't do anything else until you create that card or layout? I got this idea for using more of the Farm Fresh papers.
I put the Cricut to work Sunday quickly cutting out some flowers and leaves using the Accent Essentials cartridge. The paper strips are sewn on with zig zag stitching to add to the homey feel of these papers.


The designer papers are from two collections from two different publishers that actually coordinate really well - October Afternoon's Farm Fresh and Basic Grey's Nook and Pantry. I'm using the paper packs so the scale of the prints is smaller and really suitable for cards. The chocolate chip cardstock is Stampin' Up!

Sunday, November 22, 2009

Building a Snowman


It's not quite snowman building time around here yet. We got our only snow here last March. I built this little paper snowman for a pieced card element challenge at Two Peas and a Bucket's site. I think before it was done, I'd thrown every snow related thing I had at this card. Can you say 'tedious?' He is cute and he is going to the grandchildren's house for the holidays. Sure hope he doesn't melt along the way!

Ingredients: Stamp Sets: Itty Bitty Backgrounds by Stampin' Up!, Holiday Seasons by Inkadinkado
Ink: Versamark, Whisper White
Embossing Powder: Bridal by Ranger
Paper: SU!'s Real Red DSP, the others are all scraps, the background paper is from DCWV
Stickers from American Crafts
Twine: Martha Stewart

Saturday, November 21, 2009

Cheap Talk on the Farm

One of the great things in my Two Peas package yesterday was the 8" x 8" Farm Fresh paper pad from October Afternoon. These wonderful designer paper make you think of that perfect farmhouse kitchen with the brightly painted cabinets, deep ceramic sink and old pine table in the center of the room.

I love how they combined perfectly with the Cheep Talk set from Stampin' Up! I haven't used this set nearly as much as I'd like. With the stamping exactly the same on these two designs, I just altered the companion paper and ribbon choices.

So bright and cheery!


Ingredients: Stamp Set: Cheep Talk by Stampin' Up!
Inks: Real Red, Crushed Curry, Green Galore, Close to Cocoa
Paper: Whisper White by SU!; DSP Farm Fresh by October Afternoon
Ribbons: Green check from American Crafts; Yellow check and Red from Paper Studio

Friday, November 20, 2009

Purple and Yellow


My best friend in Junior High loved the color combo of purple and yellow. I kept telling her those colors didn't match. I was wrong, of course. But try telling that to a 13 year old. (Gee - I should have saved this for my friend's birthday, oh well. She seems to have moved on from yellow and purple.)
Anyway, I hope this card will be a bright spot in November for a lovely lady in Assisted Living.

The idea for the round card folded at the top came from Kristina Werner's blog. I used my Cricut to cut but you could also do this with circle cutters just leaving the top joined.

This ribbon has woven threads to create the daisy design. I frayed the edges so those little threads peeked through. I'd done this with fabric strips before but not ribbon. Love the effect.

Have a great weekend! (I know I'm going to have fun. The mail carrier just brought a box of goodies from Two Peas!)


Ingredients: Stamps: Baroque Motifs for some extra design on the flower, Petal Pizzazz from Stampin' Up!
Cardstock: Purple from unknown source, Certainly Celery and Whisper White for SU!
Ink: Almost Amethyst and Lovely Lilac
Ribbon from Walmart (as best I can remember)
Flower from Hobby Lobby
Chipboard letters from unknown source

Thursday, November 19, 2009

Home for Christmas Samples


I just happened to be trying out some color combinations for my own Christmas cards this year when I saw the Color Challenge (CC245) at Splitcoaststampers.com this week. The colors are:

Real Red, Always Artichoke, Chocolate Chip and neutrals.

I had already stamped two of these images from SU!'s Home for Christmas set using brown Staz-on ink on watercolor paper. I did the coloring on the second card shown before seeing the challenge so I'd used a lot of the Earth Elements colors including Old Olive and Ruby Red. I think I like the arrangement of this one best. I've really got to remember where this pretty checked ribbon came from. The supply is dwindling.

However, I really like the colors from the color challenge better than the lighter colors. Perhaps I should put the Real Red ribbon on the bottom of the card? Still deciding... What do you think?

The greeting is stamped on white twill tape using Real Red classic ink - actually I used one of the markers since I had it out - and aged with a little Ranger distressing ink. I trimmed off the ends and side and frayed the edges.

If I keep making samples, I'm going to have enough Christmas cards without having to do a mass production. :-)

Ingredients: Stamp Set: Home for Christmas from Stampin' Up!
Cardstock: Always Artichoke, Chocolate Chip, Old Olive, Kraft
Ink: Real Red, Soft Suede for distressing, Ranger's Antique Linen for distressing, Watercolor Crayons
Ribbon: 1" stitched ribbon in Real Red by SU!, Checked ribbon from unknown source
Button: Real Red by SU!

Stamped Envelopes


And speaking of envelopes... For the back of the envelopes for this Season of Simple Grace card, I used Ranger's Old Paper distressing ink to stamp the Wise Men and the star images. It gives the envelopes a subtle custom look.
Ingredients for envelope: Stamp set: Season of Simple Grace by Stampin' Up!
Envelope: Very Vanilla Medium by SU!
Ink: Old Paper by Ranger

Tuesday, November 17, 2009

TIPsy Tuesday - Lining Envelopes


Thinner designer paper is a great choice for lining envelopes. Here are my steps for adding a lining:
  1. Cut your designer paper 1/8" narrower than the width of the envelope.


  2. 2. Measure the length of the flap from the fold to the start of the adhesive. Score the designer paper lightly that distance from the top edge.


  3. 3. Insert your designer paper into the envelope. Trim off any edges to make the DSP fit with the slope of the envelope flap.


    1. 4. Fold the paper down toward the back of the envelope. Apply adhesive to the top edge only. I like a tape runner adhesive for this purpose.


    2. 5. Fold the flap of the envelope down so you are securing the two papers together with the envelope closed. This will give you a good fit and prevent buckling.


    A lined envelope is an extra touch of class for your cards.

    Ingredients: Envelopes from Stampin' Up!; Paper from My Mind's Eye

    Monday, November 16, 2009

    Simple Berries


    Here is a fast inexpensive holiday card. It is every very flat for mailing. We did this in stamp class on Saturday super quick.

    Stamp the image first in Ruby Red and then go over the stems with a Close to Cocoa or Chocolate Chip marker.

    The ribbon is tied first and just applied with glue dots. Really fast, yet very elegant.

    Ingredients all from Stampin' Up!: Stamp Set: Kindred Spirits
    Ink: Ruby Red, Earth Elements Markers, Old Olive
    Paper: Old Olive, Very Vanilla
    Ribbon: Old Olive taffeta from the Holiday Mini bundle

    Sunday, November 15, 2009

    Christmas Challenge


    My friend Sharon loaned me her Delightful Decorations stamp set and the ornament punch, both from the Stampin' Up! Holiday Mini catalog. She wanted my take on these tools so this is what I came up with. I wanted to see what I could do with the In Colors for Christmas this year.
    .
    We did this card yesterday in our stamp class. I think everyone was apprehensive, as I was the first time, about using the white gel pen and writing a sentiment. Writing first in pencil helps a lot. We learned that it is easier to go over the pencil writing with the gel pen if you keep your pencil pressure light. The gel pen doesn't drag as much. It is actually very easy and we were all pleased with our results.
    .
    With these bright colors, I thought this made a good entry into this week's Pals Paper Arts challenge.
    .

    Ingredients all from Stampin' Up!: Stamps: Delightful Decorations
    Ink: Rich Razzleberry, Melon Mambo and Crushed Curry; White Signo gel pen
    Paper: Rich Razzleberry and Crushed Curry cardstock, Raspberry Lemonade DSP
    Ribbon: White grosgrain

    Saturday, November 14, 2009

    The Right Tools make all the difference

    I love this snowman stamp from Inkadinkado. However, I only made about 8 cards last year with this stamp. It was taking so much time to color in the scarf and add the blue around the edges - an idea I got from stamping club last year. The only tools I had were inks and a paintbrush.


    This year, I used Stampin' Up marker in Real Red to color in the scarf and hat band. The aqua painter was the perfect tool for applying diluted bashful blue ink around the edges. Stamping the image in Staz-on to begin keeps the ink from smearing. Still time consuming but I bet I did a dozen of these snowmen is much less time than the 8 I did last year.

    Ingredients: Stamps: Ornate Christmas from Inkadinkado
    Ink: Real Red marker, Bashful Blue from Su!; Staz-on in Jet Black
    Cardstock: Bashful Blue from Stampin' Up!
    Ribbon: From ribbon bundle in SU!'s 2009 Holiday Mini Catalog

    Friday, November 13, 2009

    Season of Simple Grace Tri-fold


    I'm in the middle of assembling these for my Mother's Christmas cards this year. I took the design almost exactly from the 2009/10 Stampin' Up! Idea Book and Catalog. It was the card that sold me on this versatile Christmas set.
    A few things I changed from the sample or ways to do the card in the catalog:

    The card is 4" x 12" cut from Bashful Blue cardstock.

    First step was to 'sew' a row of holes 1/4" in from the bottom edge of the card. Just take the threads out of your sewing machine, set the stitching length, and sew. A 1/4" quilting foot is a big help to keep the line even. This is much faster than punching with the matt pad.


    I did get a little help from my Cricut. My circle cutting system is from Creative Memories. I've had it for years and love it. The only drawback is that while it cuts incrementally sized circles, it does skip a few sizes. In some cases with this card, it was those sizes I really needed. I used the Cricut to quickly cut the Chocolate Chip and red circles in the exact sizes needed. Stampin' Up! does sell a circle cutter that does incremental sizes.

    Also from Accent Essentials cartridge, I got a scalloped circle that mimics the one used on the Stampin' Up! card. I think they used small punched circles to create their custom scallop border. It is a pretty technique but a bit too time consuming for an already intricate card.
    The only color change was to add a little Not Quite Navy. With so many colors in this card already, I was hesitant to mix things up too much and upset the balance. I changed colors because the center Wise Man really needs to be done with markers and I didn't have the same color as the sample in a marker.

    The other Wise Men can be inked and stamped with either markers or pads.
    Also there was a Certainly Celery button next to the star. I replaced this with a circle cut out of Certainly Celery and glued off center with the star.
    There are a lot of dimensionals used on the card and I plan to give Mother 5" square envelopes for mailing so the card won't be too crowded.
    Whew! There is a lot to this one but it is for Christmas so it is well worth it.
    Ingredients all from Stampin' Up!: Stamps: Season of Simple Grace
    Inks: Not quite Navy, Close to Cocoa, Bashful Blue, Chocolate Chip, Certainly Celery, Ruby Red, Sage Shadow
    Cardstock: Bashful Blue, Whisper White, Certainly Celery, Chocolate Chip, Sage Shadow

    Thursday, November 12, 2009

    Snowflake Box

    Got in my 12x24 Cricut mat yesterday so I did a quick test using posterboard cut to the full size of the mat and the Bags, Tags and Boxes cartridge. This square box is about 3 1/2" square - a nice size for a Christmas Ornament or a gift of a few cookies. This style of box still did not use the full 24 inch width so I'm still hoping for larger boxes with some of the other layouts.

    Tip: It always seems to take me several goes to get a halfway decent bow. If you want to make up boxes ahead, you can go ahead and tie your bows too. Just leave the bottom of the box unglued so you can slip your treats in that way.
    Ingredients: Stamps: Serene Snowflakes by Stampin' Up!
    Inks: Baja Breeze, Soft Sky and Bashful Blue
    Ribbon: Hobby Lobby
    Posterboard: Wal-mart (matte finished on both sides)

    Wednesday, November 11, 2009

    Christmas Card Ideas

    If you haven't been following Kristina Werner's blog, now is the time to start. She is doing a holiday card video each week day for 25 days! Here is the link http://www.kwernerdesign.com/blog/

    I love all her wonderful ideas. It is a tremendous time commitment to do this many card designs and videos for our inspiration.

    Tuesday, November 10, 2009

    TIPsy Tiuesday - Finishing Off Threads

    When you add decorating stitching to paper projects, you have to do something with the threads. Backstitching will show so I often tuck my threads in one of two ways:


    If the stitching is in the middle of the pages as on my scrapbook layout below "Some Creatures Are So Sweet," I use a needle to pull the threads to the back side and either tie off or cover with tape.


    If the stitching runs to the end of the paper, I pull the threads taut on the reverse side and add either a dimensional or usually a photo split. Photo splits are made by Scotch. I buy mine at Walmart and use frequently for adhesive. They are relatively cheap and easy to control the application. The permanent ones hold well. Plus because they have a peel off layer, you can apply a photo split and then peel and stick when you ready to finish your layer which is perfect for dealing with loose threads! You have the added bonus of already having adhesive on the back of whatever you are working on. Sometimes the basic stuff is really the best.


    Remember tomorrow is Veteran's Day in the US. It is a great opportunity to thank a veteran for their service to the country.
    Ingredients: DSP: Western Sky by Stampin' Up!
    Cardstock: Not Quite Navy, Ruby Red and some scraps from unknown sources
    Tool: Cricut Bags, Tags and Boxes cartridge, Plantin Schoolbook Cartridge

    Monday, November 9, 2009

    Play time

    Last night, I finally tried out this design on the Cricut. It is similar to Stampin' Up!'s Top Note die. On the Cricut, I can make it any size I want. The trade off is that I lose some of the sharpness on the points.

    Next I decided to play with some of the stamps that jumped into my hands the last time I was in AC Moore. It is a really good thing that I live far enough away to only go there every couple of months. Last week I innocently went in to find some decorative paper like I'd used on Christmas cards last year. They didn't have it, but they did have two large box setes of stamps from Inkadinkado with 5 stamp sets in each box for $5.99 per box! Who could resist? The stamps are small. They would be great on enclosure cards, tags or as a little extra along with a regular stamp. Each box contained a greeting set and I always need words.

    In my sample I've used a bunch of those small stamps to create a single design. This card isn't my usual style but it is fun to do something different. I did enjoy my playtime and had a nice break from holiday cards.

    Ingredients: Stamps: Spring Blossums from Inkadinkado
    Ink: Stazon
    Watercolors: Rich Regals watercolor crayons from Stampin' Up!
    Cardstock and ribbon from unknown sources

    Sunday, November 8, 2009

    Wise Men Christmas Card

    Do you ever get fixated on the idea of how a stamp should be used? I've been that way with the Wise Men stamp in the Season of Simple Grace stamp set. I've been determined to use them in jewel tone colors - coloring each one in a different color. I wanted to use them for a card class coming up next Saturday but I knew we didn't have time to color and probably trim out the wise men and do the coloring I have on other cards.

    So I browsed Splitcoaststampers and found a great design by Jennifer Maloney which used gold embossing for the wise men. I changed the cardstock colors a little and added a strip of gold cardstock. Otherwise I kept the arrangment the same. This card comes together quickly with a lot of impact.

    I have two spots left for class Saturday November 14. We are making 8 total holiday cards. Please contact me by Tuesday if you are interested.

    Ingredients: Stamps: Season of Grace by Stampin' Up!
    Ink: Night of Navy, Versamark; Ranger's Antique Linen
    Cardstock: Night of Navy, Brocade Blue, Elegant Eggplant and gold
    Brads: gold from Stampin' Up!

    Friday, November 6, 2009

    Some creatures are so sweet


    There is really no story to this first page. The photos were cute, they really went with this cool paper from Basic Grey and they made a great lead in to the real story...

    The geese. The greedy geese, although that may be redundant. I figured the conversation bubbles would be enough to remind us of the story in the future. It was a beautiful day on our way to Hilton Head, we stopped at Edisto Memorial Gardens to have our lunch and stretch our legs. We just picked the place where we would get the least peace. The bottom photo with the goose's beak chopped off was made with me trying to hold a camera and a sandwich at the same time. I dared not put down my food!


    I added some decorative stitching to give the distressed paper a little texture. Drop by next Tuesday for tips on how to finish off decorative stitching on pages and cards.

    Ingredients: Paper and ribbon: Periphery Collection by Basic Grey
    Ink: Soft Suede for distressing letters
    Fonts for cut out letters using SCAL on the Cricut: Scriptina and Problem Secretary from Dafont.com

    Thursday, November 5, 2009

    Great class!

    I'm taking a wonderful class on-line to learn more about Photoshop Elements. It is at Two Peas in a Bucket and it is free! They have several other classes listed. Some free; some with fees. Here is the link --> http://www.twopeasinabucket.com/education_class_list.asp

    In Sande Krieger's class, she starts at the beginning with Elements. I know many of the basics yet I've learned so many tips and shortcuts. Elements is very powerful and in my opinion very challenging to learn. I've tried books, magazine articles, other on-line tutorials and just plain trial and error. This is the best training I've had.

    There are other classes on card making and scrapbooking, too. It is wonderful to have so many opportunities at our fingertips!

    Wednesday, November 4, 2009

    Distressed Tag Card


    To test out the Cricut's ability to cut posterboard, I cut out this tag and flower. I don't have much experience with posterboard; there may be heavier types. This was from Walmart and not much heavier than cardstock. It is however, large. So I can cut it to a size that will fit the 12x24 mat I have on order and use it for larger items like boxes. The test was very successful and if I had stopped there, I would have saved a lot of time.

    At first I just stuck the tag and flower in the drawer to use later but it was calling me to create something. So I went through my scrap designer paper and found these pieces that went together. The posterboard was a bright white and didn't go with the background papers. To age it, I used Ranger's Antique Linen and some So Saffron from Stampin' Up! The flower is actually colored on both sides. I got it much too bright the first go round, so I flipped it over and tried some watercolor crayons for a better effect.

    What started as a quick test, turned into a time consuming card but I'm really happy with it. Saving time is not what making handmade items is about anyway. I bet we all have people in our lives who don't get why we spend so much energy on making something we could just as easily buy, but aren't you glad there are so many of us who do 'get it'?
    Ingredients: Stamps: On Your Birthday from Stampin' Up!
    Ink: Antique Linen by Ranger; So Saffron, Baja Breeze, Ruby Red and Rich Regals Watercolor crayons by SU!
    Paper: DSP from My Mind's Eye
    Ribbon and button from unknown sources

    Tuesday, November 3, 2009

    TIPsy Tuesday - Cleaning Large Stamps

    When working with a large stamp like the Medalion Background stamp, I usually ink it by laying the stamp down rubber side up and then applying the ink pad to the stamp. I do the same upside down approach with cleaning. To clean a large stamp:
    1. Spray the surface of the stamp with Stampin' Mist.

    2. Hold the stamp in your hand, take the cleaning pad from your Stampin' Scrub and scrub.

    3. Do the same with the dry pad from the Stampin' Scrub.

    I find this easier on the hands and you get a clean stamp the first time.

    Speaking of the Medalion stamp, to get the effect on the card above, I stamped the outside quarter circles with Versamark. Then I used light shades of Stampin' Pastels to go over those designs. Lastly, I stamped the half circle design in the middle of the paper and used darker shades of Stampin' Pastels on this design.

    In all cases, I inked the stamp rubber side up. I applied the paper to the stamp so I could see exactly where my image would appear on the paper.

    Ingredients: Stamp by Stampin' Up! Medalion, Kind and Caring Thoughts (greeting)Ink: Versamark, Purely Pomegranite, Stampin' Pastels

    Paper: Unknown sources

    Ribbon: Fabric store

    Monday, November 2, 2009

    Serious Pink

    Seriously this is a lot of pink. And it is for a good cause. Pals Paper Arts is joining so many others in raising awareness of breast cancer.

    If you would like to participate in their card challenge, you only have a half day left - ends Tues, Nov 3 at noon. Sorry for the short notice, I just found this one this afternoon via Mary Fish's blog (She's on my blog list at right - Stampin' Pretty). They have a great random giveaway for particpants at http://www.palspaperarts.com/2009/10/ppa14.html

    My all Stampin' Up! card uses only two stamps and three ink colors. I decided to get a jump on Valentine's Day designs with this challenge.

    Ingredients: Stamps: Polka Dot Punches and Alphabet Soup
    Ink: Pixie Pink, Whisper White, and Pink Passion
    Paper: Pixie Pink and Pink Passion
    Ribbon: White grosgrain
    Tool: Full heart punch

    Sunshine and a Smile


    Beachwalking is my favorite activity at Hilton Head each year. Though I don't always appreciate it when I have to get up so early to see the sunrise - that is until my feet hit the soft sand and my husband smiles at me. I love this photo of Lenny so it needed a special layout.

    The background is a slightly varied design in blue from the Periphery collection of Basic Gray. "Sunrise," "a," and the journaling were printed in the background paper. Then I used the Medallion background stamp from Stampin' Up! for the two circles of color behind the photos. I stamped in Versamark and used Stampin' Pastels to add some subtle color like the sunrise.

    Using the SCAL software and my Cricut, I cut "Smile" and the "&." It was my first time cutting vellum so I had to play with the settings a little to get a good cut.

    It is usually at this point that I overdo my layouts. I get them done but feel they need just one more thing to fill a blank spot. Fortunately, I added a very subtle final element by using the Medallion stamp and some Whisper White craft ink to stamp the same image several times in the lower right corner. It was just enough.
    Now if I could just get up before sunrise tomorrow morning and go walking on the beach.
    Ingredients: Stamps: Medallion by SU!
    Ink: Whisper White, Stampin' Pastels in Lovely Lilac, Regal Rose and Apricot Appeal
    Paper: Periphery collection by Basic Grey, Vellum and gray from unknown sources
    Fonts: Times New Roman; Aubrey, Angelina and Prophecy Script from Dafont.com

    Sunday, November 1, 2009

    Cricut to the rescue!

    If you took my card class in September, this card will look very familiar. You will also remember that even though I had already cut the circles out for our class, it was still time consuming to assemble. Well, on Friday I made 12 of them! I knew I had to come up with an easier way to cut these card pieces.

    For the original card, I cut circles out of rectangular pieces of Not Quite Navy and Barely Banana cardstock with my Creative Memories circle cutters. I love their circle and oval cutting system. I've had mine for many years and used them countless times. However, in this case it was tedious cutting all this circles just where I wanted them and making sure the Barely Banana layer didn't stick out from the N.Q. Navy one.

    To make things go smoother for these cards, I used the Sure Cuts a Lot (SCAL) software and my Cricut. I laid out the rectangle with a circle inside - it is easy to specify exactly the size cirle you want) and then cut a sample of each size. I then just copied this design over and over to cut as many as possible from each 12x12 paper. (The sample above uses a tan cardstock because I was out of Barely Banana.) The only complaint I would have is that you can't cut all the way to the edge of the 12x12 sheet. Looks like it goes only 11 1/2" x 11 1/2" but I haven't investigated enough to be sure.

    There was still a lot of assembly to this card but it went much faster and more precisely. I didn't have to worry about cutting the wrong size circle. I could spend my time designing and stamping which is much more fun.

    I love it when you get a new tool and find even more cool things to do with it than you thought.

    Ingredients: Stamps: Season of Grace from Stampin' Up!
    Ink: Not Quite Navy, Crushed Curry
    Paper: SU! DSP Bella Blue, Not Quite Navy from a Patterns Pack, Not Quite Navy and Whisper White cardstock. Other cardstocks are from Hobby Lobby.
    Related Posts Plugin for WordPress, Blogger...